You didn't ask for it. You probably never thought to want it. But here it is regardless; How to build a Blickensderfer typewriter, or more specifically a Rem-Blick.
Before I begin, I would like to state the following: The Blickensderfer is the smallest, most ingenious bundle of typewriter engineering I have seen to date. Its design is simple, yet complex. Elegant, yet robust. And I am ever so glad to have had the chance to delve into one.
---------How does a Blickensderfer work?---------
What sort of black magic is involved in making a blickensderfer work, you wonder? Turns out, none. Shocking, I know.
The Blickensderfer works on a basic gearing principle. By pressing a key, a partial gear is moved on the body, which acts upon a similar partial gear on the typewheel mechanism which turns the typewheel itself. Each keylever has a small, specific-length extension which, upon being pressed, moves the gearing lever by a certain amount before then moving the universal bar. Due to the symetrical design, when both left and right gears attempt to move, the typewheel does not rotate. This allows, due to the previously mentioned difference between the gearing lever and the universal bar, the selection of letter or symbol. The depressed keylever swings the typewheel to the spot it requires as it then hits the universal bar, stopping any further turning of the typewheel. The depression of the universal bar moves another gearing set which swings the typewheel downward, where it impacts the inking roller and then the paper.
Movement of the carriage is far simpler. There is a main action piece which, upon its forwards and backwards movement, allows teethed levers to swing slightly, which grab the carriage teeth and push it forward a spot.
And so here we begin:
When taking 3 bank typewriters apart, there always seems to be the rule of 3; each machine has 3 distinct, separate main parts which make it up. For the Blick, the 3 are the main body, the typewheel body, and the carriage. This first part details the main body of the machine.
Here we begin with the main body plate.
Please note that I did not take the main action levers out of the machine due to the screws responsible for allowing that having their screw slots snapped off entirely. 90 year old metal always has the chance of being too soft to safely work.
First, we add the shifting keys. From left to right, the sequence is washer, figure key, capital key, slotted-end of screw.
Once added to the machine, they should sit happily on their stubs.
Now we add the front guide plate, which also has the shifting action lever on it.
With the plate on (allow it to be slightly loose up until the end of this entire post), we now move to some small additional details.
This spring connects to the 3rd operational segment of the shifting sequence, and the small roller goes just below the guide plate in the center of the machine
Next we add the shifting lock/stop. Before this is in place, dont expect your shifting keys to operate correctly with the action lever.
Now that thats installed, and the spring having been placed, the shifting keys should be resting at their natural state.
Here is the main action piece of the entire machine, which drives the movement of the carriage upon a keystroke. The small screw is what the main spring attaches to.

To get the piece in place, you will have to carefully, but with strength, push the smaller end up into its correct position above the roller while getting the back end into its slots.
Then attach the screw to the underside.
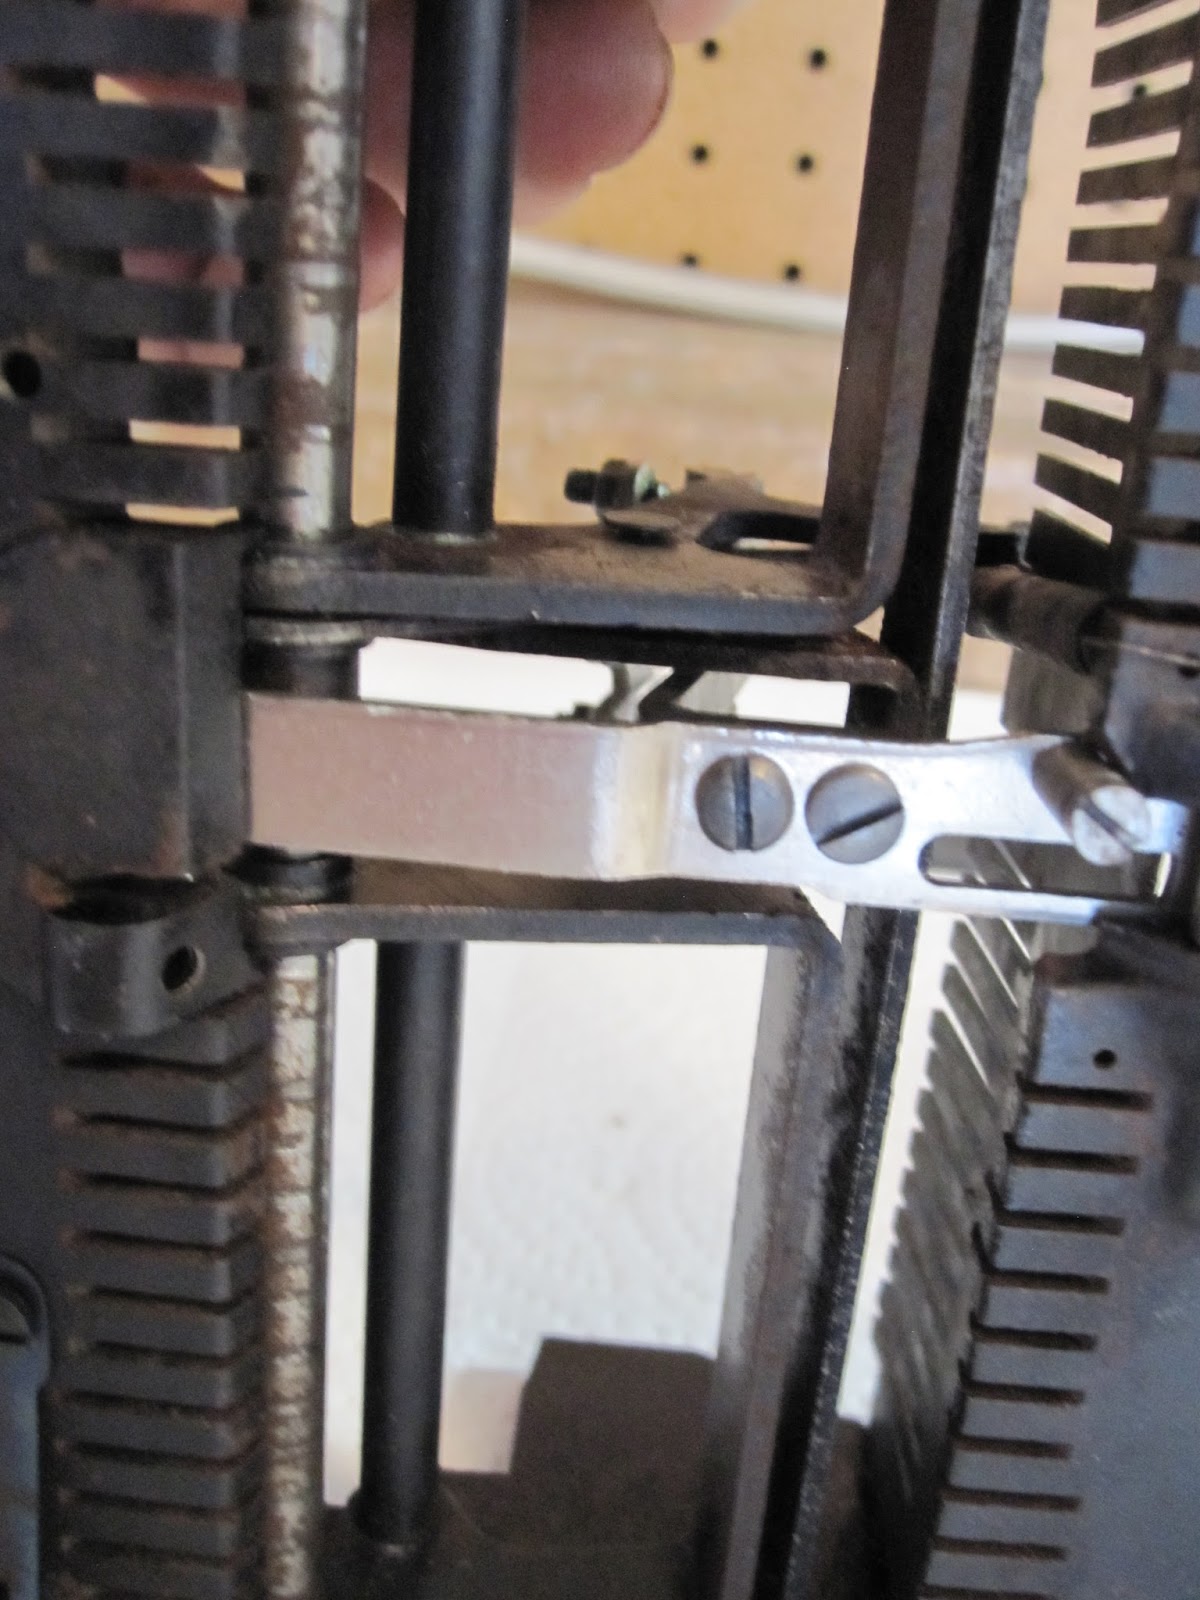
Now we add this long piece which is what connects the main silver piece to the action of a keystroke.
This is a horrid picture, but you can see the piece to the left of the center vertical line.
Where it connects on the bottom;
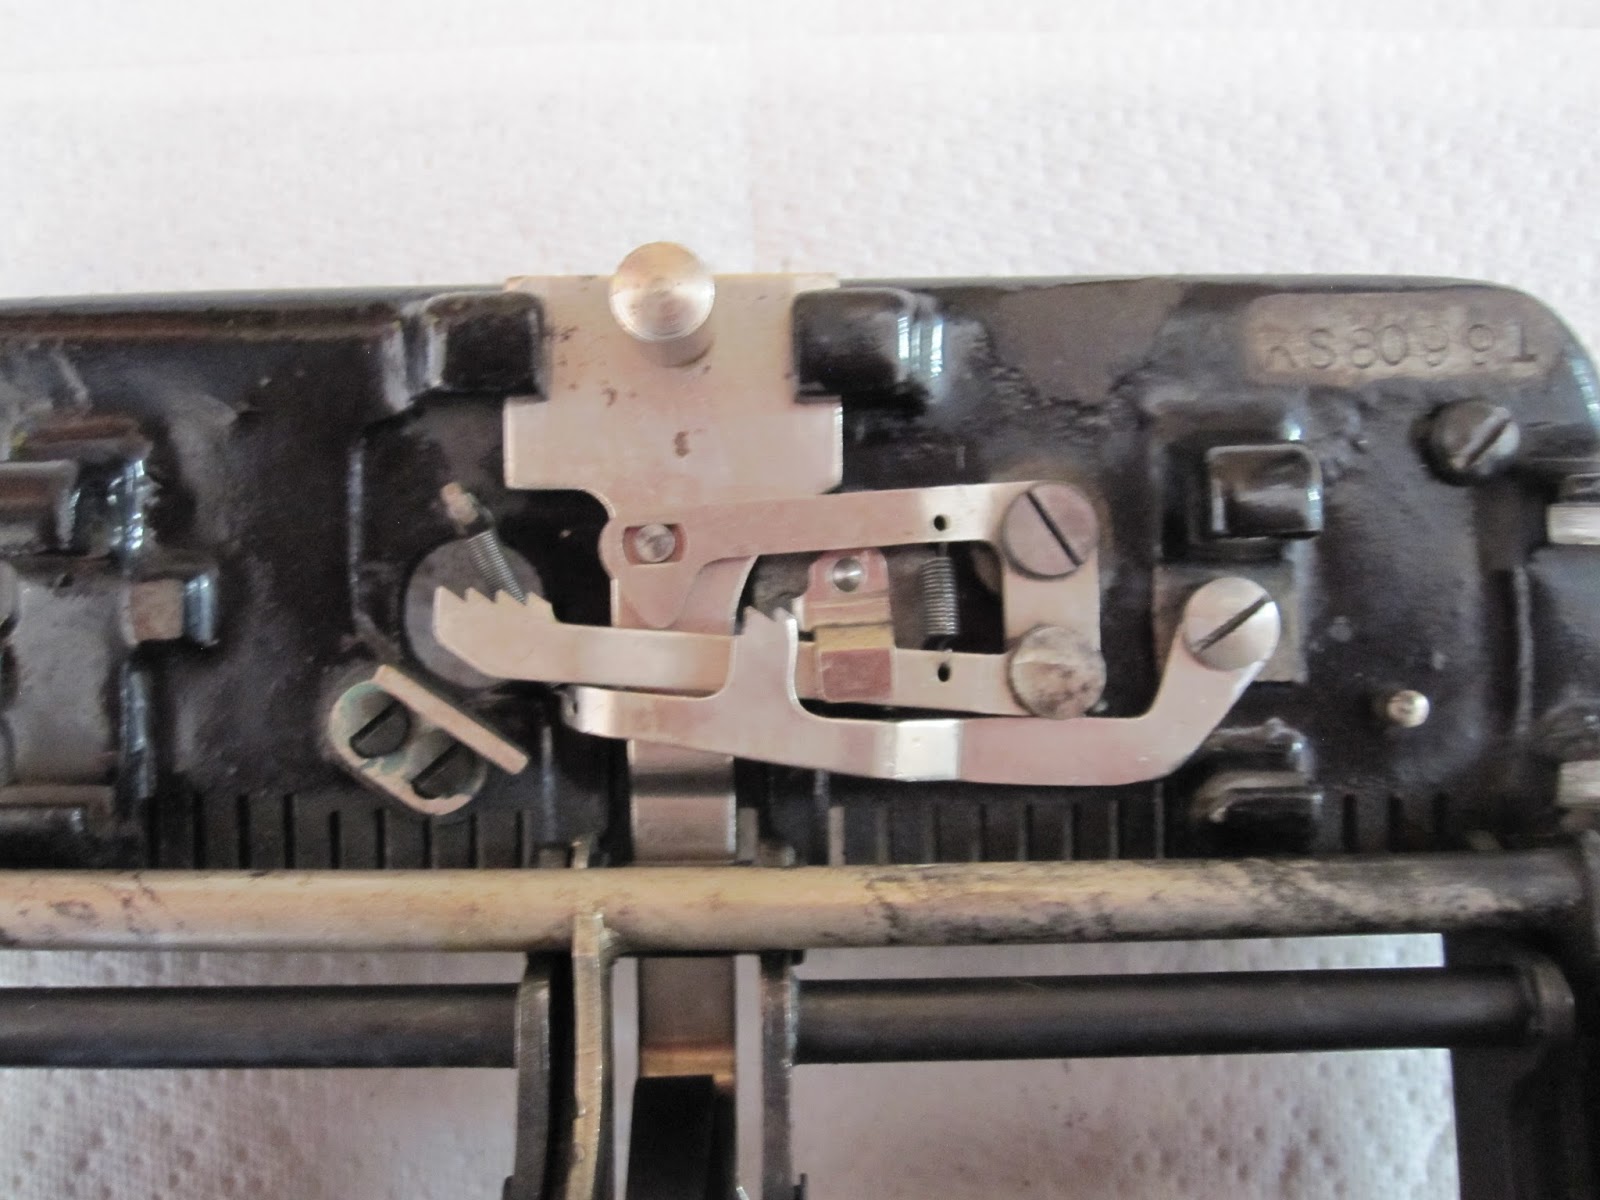
Next up are the bits which actual move the carriage at the keystroke.
The small bit, which screws in from the bottom, is a stop for the main movement and also is used to guide the next piece.
Please note that the piece towards the bottom has a spring which attaches to the body of the machine just above the teeth of the other piece.
Next we add the other keylever comb, towards the back of the machine.
Woops, forgot to show where it goes. It screws in just behind the main side juts from the cast frame.
Now we can add the keylevers. I clean them 3 at a time, then add them to the machine so that I don't go insane from doing all 28 in a single sitting.
To place them in the machine, simply slot them in through the guides and push up on the hooked back so that it clasps onto the large rod which, as stated, I did not pull out of the machine.
Tada!
Now we add the keylever plate which keeps the levers from coming out again.
Make note that the cutout curve opens down and not up, to accommodate the main spring. After putting this plate on, I went ahead and put all the keylever springs back in place. They hook onto the keylever itself with a half loop, and stick between the front guide plate and the frame with a small zig-zag, and hold in place.
Next we add the main spring, and its adjustable holder.
Quick and easy, the main driving force of this machine is in place.
Next is the bottom plate, to protect the innards of the machine.
You now have a completed body of a Blickensderfer!
Next up; the typewheel body.