I have been meaning to show off how to build a Fox portable for some time, and this recent slew of Fox related posts by other members of the typosphere convinced me that now is the time to just go ahead and do so. I have rebuilt 4 other Fox portables in their entirety and, counting a re-build I did once on one of them to try and get it to function better, I count this as my 6th time building from scratch a Fox portable. I've got it memorized by heart to be honest.
And so, here we go.


First we take the frame. On very early portables, the frame can be further disassembled down to its two side pieces and the secondary guide. At some point, however, they stopped using a screw and nut combo to combine these pieces and went for what looks like a mushroom rivet to ensure proper alignment of the parts.

Frame in hand, we grab the back of the frame, made of uber light-weight aluminum. This thing weighs almost nothing.

And presto, the frame is ready to go.

As a note, these small screws are what you'll need to use to adjust the lower limits of character printing for lower case letters, should you have that issue.


We now add the key lever guide. On some machines, you 'll notice the bent bit sticking towards the front of the machine, and on others (such as this one, don't mind my accidentally wrong placement of it in the second picture) it will face towards the back of the machine. I have no idea why this discrepancy occurred.


With the key lever guide in place, well now add the bottom plate to the back of the frame. This plate serves two functions; it is the pivot rod which the key levers hing on, and it has hooks to accommodate the key lever springs.


Its already time to add the key levers. The lever system is a two part one, as you'll see below. When adding keys, remember that 3 banks use the rule of vertical rows; Keys 1 through 3 will be Q,A, and Z, respectively. 4 through 6 will be W, S, and X, and so forth.


To add the second part of a system, I push the key lever back out of its resting position on the back of the machine a bit, connect the two, then guide them both back into position. I would like to suggest that each time you add a key, and secure the rod shown below in place, you test the key for friction. Issues are better to resolve up front rather than later.

This rod secures the second lever part to the back of the frame. I feed it through each new lever every time I add another one.


Things should go smoothly, but once you get E set up, stop and reflect. What is the meaning of life? The meaning, you will find, is to now add the spacebar.

Here is said spacebar. On earlier machines, there is no connection bar between the two levers. The bar, however, greatly improves the spacebar stability. There will be two second part levers without the small hole at their top which correspond to the spacebar.


As you near the far right spacebar lever when adding more keys, you may find it beneficial to add the prior 3 levers before connecting them to their second parts.

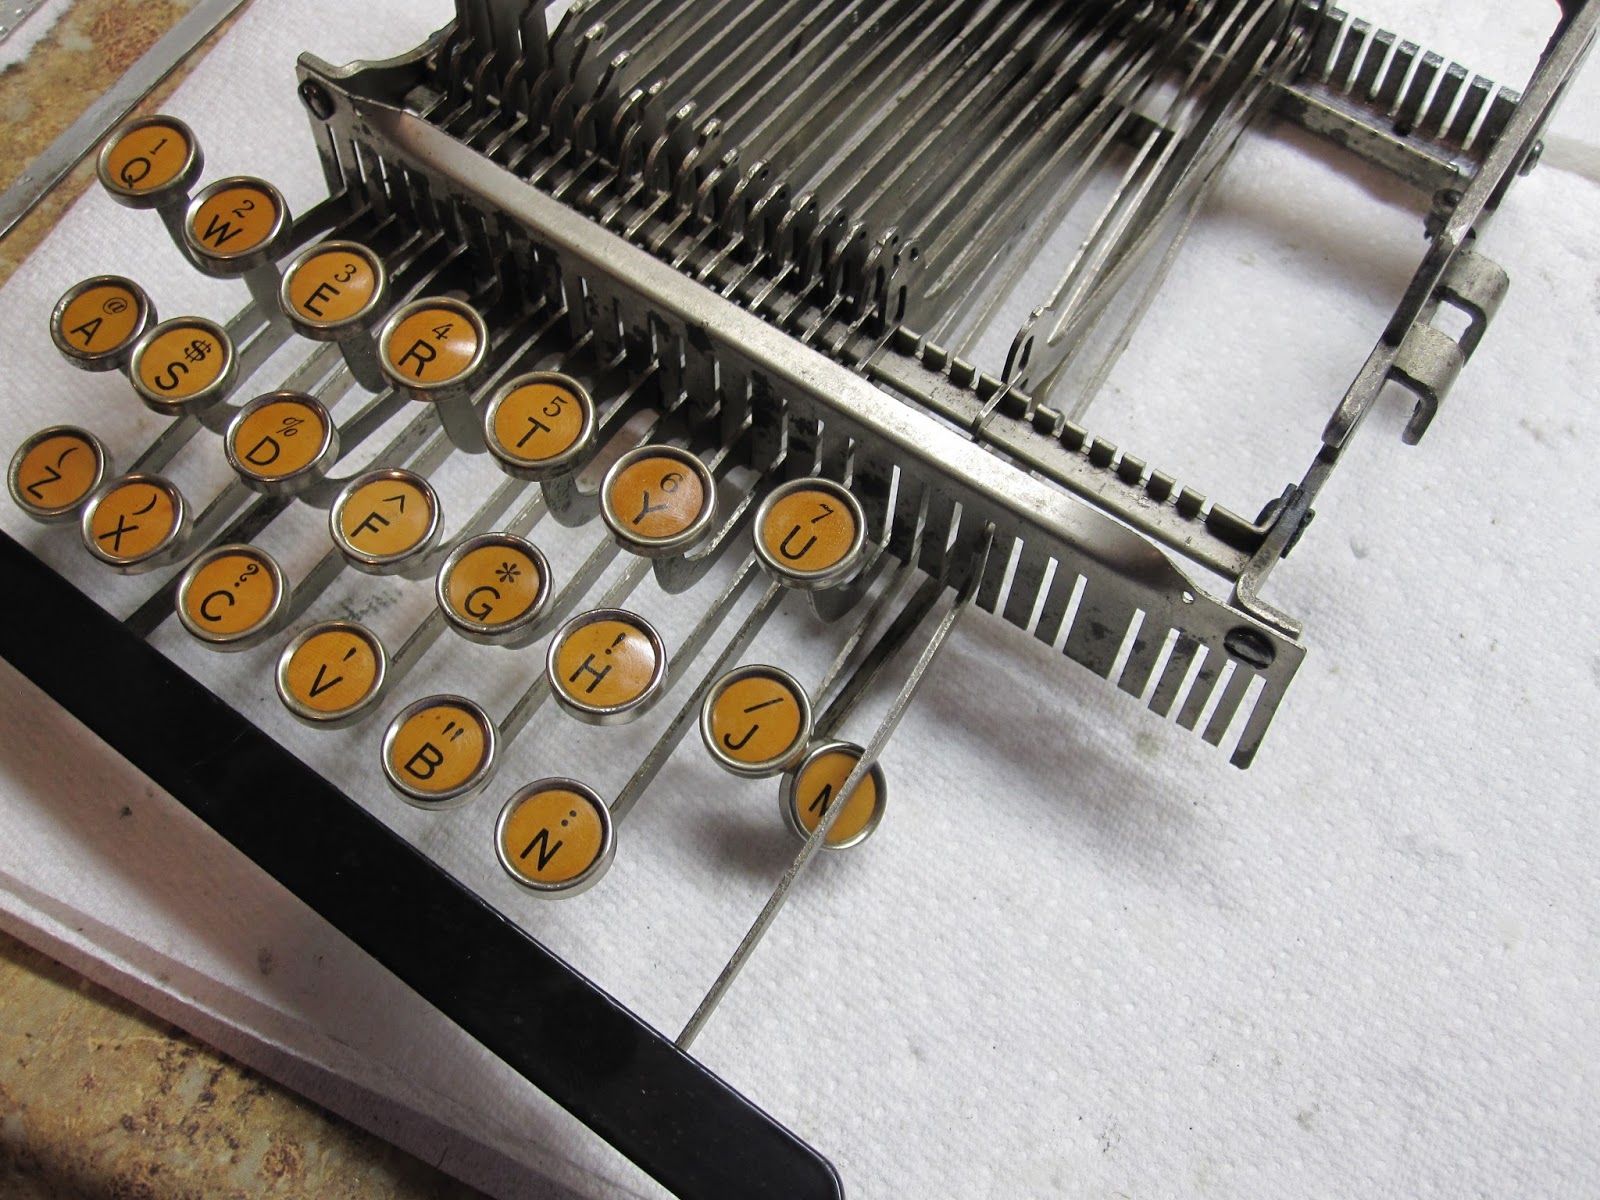

Now, finish the keyboard.

We grab these tiny screws, which will hold the small rod introduced earlier in place on the back of the machine.

Look at the back of your frame carefully and find those few spots were there are screw slots. It is very easy to strip the slots, so be gentle.

Now we add the springs for the keylevers.


Your keyboard should now be fully erect and level.

Now we add the shifting bar, with shift keys already attached.

Its hard to describe what to do, but I'll try anyway. You'll want to finagle the left side at an angle into its slot while pushing the second part levers towards you. It may require a tiny bit of force, just be slow and careful.

To secure the shifting bar in place, we also want to grab the backspace key lever.

On the left of the frame.

And on the right. Notice that the screw and nut holding the shift bar also holds the backspace lever.

Now we add the slotted segment.

These screws are on the bottom and connect the segment to the shifting rod.


Now we add the second part of the backspacer, and the shifting action piece.

The right side screw for the shifitng action piece also hold sin the second part of the backspace system. Screw is not in place yet, but you can see where it will go.

The thin small screw goes on the left.

My camera deleted the picture showing the part, but it is a long curvish rod which you will screw into the shift key below the Fig, and will connect to the other hole on the shifting action piece shown in the previous picture, just above the previously added small screw.

Now the fun stuff. 28 Typebars and the typebar rod. Woooooo, try not to go insane.

One at a time we add the typebars, connecting them first via their segments to the second part of the key lever, then sliding it into place in the slotted segment, and running the rod through it.

Here we are 28 typebars later, and a little less sane for it.

There are screws on the back of the slotted segment which will guide the rod in as you work, and lock it in place once done. Remember to tighten these. Also check at this stage that hitting each key produces favorable results.

Now the typebar rest.

Oh no! You say, distraught. My keys are all out of whack and look something aweful! Woe to me and my childrens children. Do not fret. This is a common issue. Also of note, if your key levers are depressed and the typebars are normal, youll just need to do the following in reverse.

Go to the back of the machine, and unscrew the four screws holding the back frame bit on just barely. Youll see immediate change in the typebars position. Now, kick out the bottom of the frame with your hand and see if that helps, then screw in the screws again. Sometimes, tightening the screws too much will also cause the typebars to kick up, so its ok to not fully fully screw the screws back in super tight. As stated, to get your key levers up, youll want to kick the bottom out rather than in, which should produce results.
On earlier machines you could also move the bottom plate a good bit and play around with the levers and typebars in that fashion, but later on they were designed to be locked in a single spot with little play, as on this machine.
On earlier machines you could also move the bottom plate a good bit and play around with the levers and typebars in that fashion, but later on they were designed to be locked in a single spot with little play, as on this machine.

Your typebars are now predominately level. Another issue which may occur is that the connecting rods between the second part of the lever system and the typebars is bent. You may need to unbend them manually if this is the case, which can be done without disassembling the machine..

Next we add the two alighment screws, and two shifting support springs. I forgot to picture both springs and spring arms.

Earlier machines had a large spring which went front he guide plate to the shifting rod itself. Later machines have these springs which pull down on an arm which hooks onto the underside of the segment support arm, and helps pull it upwards. One on each side.

These alignment screws are not currently of use, but will be once the carriage is added. They help move the typebasket slightly left or right to align with the carriage typeguide.

Now we add the universal activator.


Your Porta-Fox body is nearly complete. Only a few finishing touches remain...

such as the outer frame. Normally you would also be adding the carriage as well, but this section is devoted only to the body, so well make due.

Bam.

The body of the most beautiful of portable machines (in my opinion) in full splendor.

Stay tuned for Lets Build A Fox Portable: The Carriage Of A Porta-Fox
I'm usually daunted by disassembling anything past removing the shell and the carriage.
ReplyDeleteThe way you completely take apart and put typewriters back together really deserves my admiration!
The secret to my success is the fact that I only do this to older machines. Early typewriters are very simple compared to later machines. I could take apart a 40's royal, but would most likely go insane trying to rebuild it without the factory jig assemblies.
DeleteThat is a very clean little Fox. I've said it before, but I'll say it again: your work is inspiring. Also, your detailed photographic documentation of your process benefits the typing community.
ReplyDeleteI am still too cautious and uninformed to attempt a dismantling and reconstruction project like this. Some day though, I may have the guts and knowledge to take a wrench and screw driver to my Oliver 9.
Better to take your time to ensure you know that what your doing is what you want to do than to go headlong into something youll regret in regards to things like this. I love delving into them and understanding how they work, however, and if it means I can become some sort of expert on tuning a particular machine, then by all means I'm for it.
DeleteVery impressive. You're ready to be employed at the Fox factory ... or at some 21st-century typospherian makerspace. They will arise, I prophesy!
ReplyDeleteWith the rise of 3D printing, and new, more durable materials for it, I forsee 3D printed typewriters possibly becoming a thing. If this happens, I want to design my own!
DeleteBravo! You make it look easy :D
ReplyDeleteJust as you make dealing with those Selectrics look easy. I recently acquired my grandfathers selectric, which has plenty of issues, and can hardly deal with it for a few moments without giving up.
DeleteWell, they *are* rather densely packed with many hundreds of parts with inscrutable "butterfly effect"-style functions. In the end, though, it's all a "this looks like it should be moving freely and it's not" deal, which I approach with extreme ignorance and hubris. I suspect that brownies actually fix my machines during my frequent frustration breaks. :D
DeleteIn any case, I have a bunch of Selectric technical/adjustment manuals in PDF if you need more documentation.
Well done! Very much enjoyed seeing this displayed as a process, front to back. This is the kind of thing that we need more of, so that collectors and enthusiasts are constantly reminded that these are first and foremost machines, and not simply or just objects of admiration or (worse) investments.
ReplyDeleteOne of my philosophies in life is that you should never not use something just because it's antique or rare. Rather, one should appreciate it by using it for its intended purpose, honoring the reason it exists in the first place. In light of that, I have transitioned that thought into typewriters in that each is a machine that was once only parts. Therefore, if it can be disassembled, it can be reassembled, and if it is beneficial to do so to either clean a machine or repair it, then by all means I do so. And in doing so, I learn lost techniques for dealing with such machines that perhaps no one else alive knows. Fox example, the Fox; I learned how to fix that common issue of type-bars sticking up or keys being oddly depressed. I learned how to adjust the base of the machines alignment to correspond with the carriage. As you said, and with which I fully agree, these are indeed first and foremost machines.
Delete