Today, I set about the task of tackling the main typewheel mechanism of the Blickensderfer 9. I finished up the body the other day, and was eager to get this machine back to operational condition as quickly as possible.
It had other ideas.
Beginning with other matters, here are some reference photos for anyone who needs 'em.
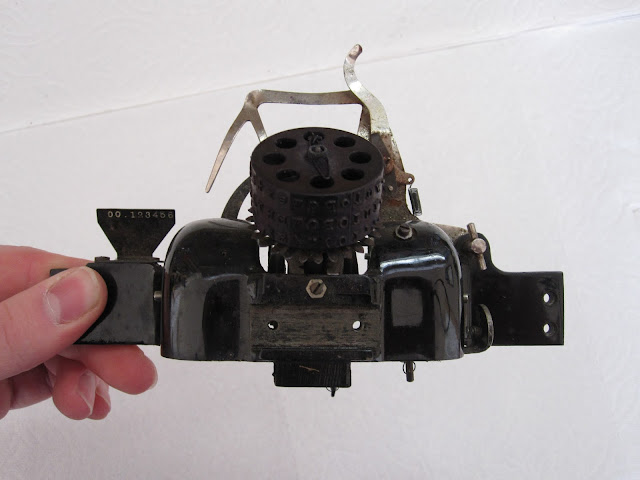
And here is the actual mechanism, once taken from its shell. It is held in place by two pins, which are in turn held in place by two screws. Very easy to take out, though do be careful of the small spring which connects towards the back.
Once I got it to this point (and having taken off the small circular parts with the rods on them - not pictured), the gearing decided to randomly start working again.
Huzah! I thought. I won't have to dissect this any further! But alas, I found to my horror that the typewheel would not come off. Nor would it shift.
My hopes dashed against the rocks, I liberally applied(AKA completely washed it down) with some liquid wrench, and gave it some time to soak.
Due to an unfortunate chain of events which will not be described here, my efforts to get the typewheel off resulted in the utter destruction of said typewheel. Save for the damnable core, which was in every sense of the word fused to the metal pin.
I'm now trying to determine how to proceed, having sadly lost the typewheel and still needing to get the (copper?) core off of the pin. The mechanism still refuses to shift as well, and due to the nature of the design, I cannot get the rod out at this point.
At the very least, in dealing with so many machines, I'm used to being hit with a brick at every turn. So there's that.
Onto the less-sad side! The body, as mentioned, is done save for the upper mechanism.
Tada! Oh wait, I'm terrible at photography. You're gonna have to to trust me that it looks great. (I'm waiting to put the front frame on after I get the feet situation worked out properly)


Oh no! How frustrating!
ReplyDeleteIn all honesty, I have never dealt with a more frustrating machine. I don't think I'll ever be taking one of these fully apart again.
DeleteLooking good there. Keep working at it. These are beautiful machines to look at, that;s for sure.
ReplyDeleteThe type wheel WILL come off, you just need to be persistent and and not use excessive force. It often bonds with corrosion to the centre pin. You'll get there.
I'm afraid that I had used excessive force. I was trying to leverage the center bottom of the typewheel with two screwdrivers, putting pressure only on the stronger core. Things didn't go quite as expected.
DeleteOuch, what disaster!! What opportunity! Necessity mother of etc... :-)
ReplyDeleteHave you still good-enough the parts for taking dimensions and layout? As a cast part, prime candidate for printing new! The core out of SLS (low cost, strong, resilient) and the outer sleeve with type from FUD/jetted acrylic (very accurate, hard, jolly expensive). Grand project! ;)
Though thats a great idea, I'm afraid the typewheel quite literally disintegrated once it fractured. A pile of little bits was all that ended up being left. However, in the future, that may be the way to go to get everyone that has a Blick a full set of typewheels! If we all share our special wheels to use as molds, we could have more typewheels than typewriters!
DeleteThat's a pity. Though if you've got a same-size, intact wheel to take measurement, then it's probably quite feasible. May need a cpl of iterations (at non-trivial cost), but then could make new wheels. No worries then about breaking the old ones by typing (and new typefaces too! :-)
DeleteWon't be long methinks; prices are dropping still for 3DP materials and new materials added. That new black acryclic detail at SW could perhaps do it in one print/part.